Customer Console Guide
The customer console lets you manage your account information, API keys, plan, and usage from a browser. For the Detection API specification, see the API Reference.
| Item | Value |
|---|---|
| URL | https://liveness.api.pas-ta.io/console/dashboard |
| Authentication | Email address + password + two-factor authentication (TOTP, mandatory for all accounts) |
The
/console/*endpoints used internally by the console are a screen-only backend (cookie-session authenticated). They are not designed to be called directly from your programs and may change without notice. For programmatic integration, use the Detection API (/v1/*) withX-API-Keyauthentication.
For the initial account setup procedure, see the Quickstart.
Signing in and two-factor authentication
Sign-in
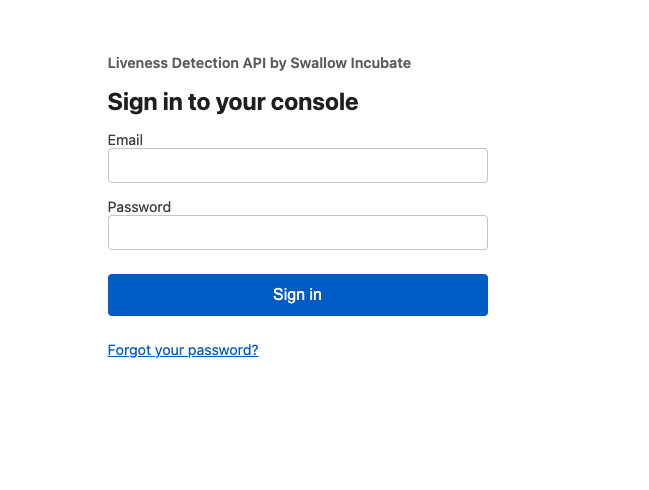
Enter your registered email address and password, then click Sign in.
Two-factor authentication (TOTP)
Two-factor authentication is mandatory for all accounts. After password authentication, enter the 6-digit code shown in your authenticator app and click Verify.
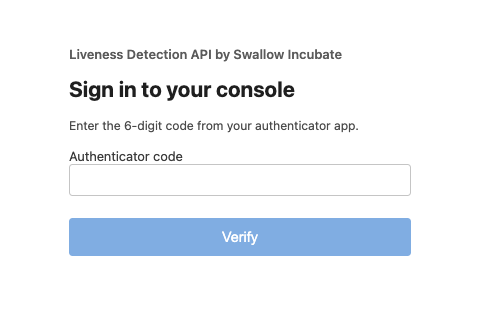
- The code refreshes every 30 seconds. If it changes while you are typing, enter the new code instead.
- Only at your first sign-in, a QR code scanning screen appears instead of this one. See Quickstart Step 4 for the setup procedure.
- If you lose access to your authenticator app, you cannot recover on your own. Please contact Support.
If you forget your password
Use Forgot your password? on the sign-in screen. Set a new password with the 6-digit code sent to your registered email address.
Reading the console
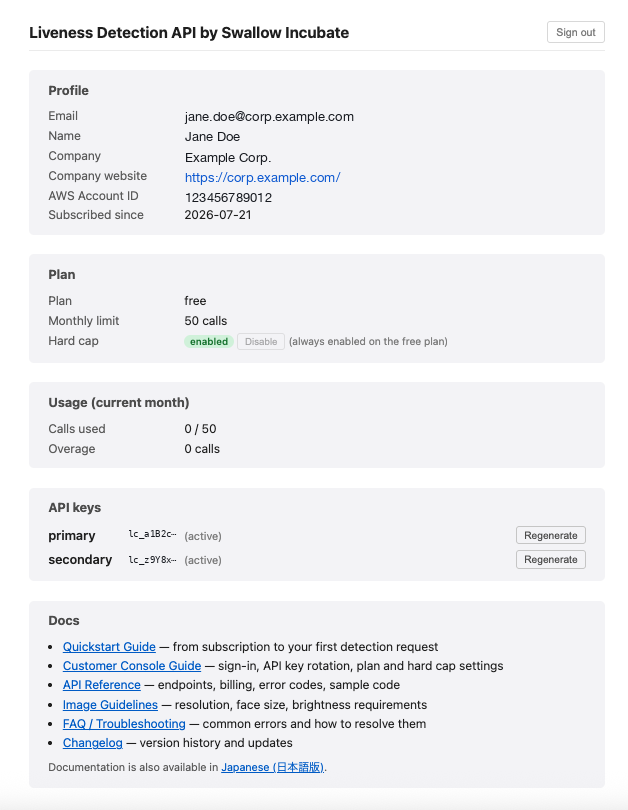
| Section | Contents |
|---|---|
| Profile | Email address, contact name, company name, company website, AWS Account ID, subscription start date |
| Plan | Current plan, monthly call limit, hard cap status |
| Usage (current month) | Calls used and overage calls for the current month |
| API keys | Leading prefix and status of the Primary / Secondary keys, and the regenerate buttons |
| Docs | Links to each documentation page |
Managing API keys
Each account is issued two keys, Primary and Secondary. Both work identically; keeping one as a backup enables zero-downtime rotation.
- The list shows only the leading prefix of each key (
lc_abc12…). The full key is displayed only once, at the moment it is issued (account activation or regeneration). Store it in a secure location such as a password manager. - Regenerate: Immediately invalidates the target key and issues a new one. The new key is shown once, on the spot.
Example rotation flow
- You suspect the Primary key has been compromised.
- Switch your application to the Secondary key to keep the service running.
- Replace the key reference in your code or secret store.
- Regenerate the Primary to invalidate the old key.
- A few days later, switch back to the new Primary and regenerate the Secondary as well.
Plan, usage, and hard cap
- Plan / Usage: Shows your current plan, monthly limit, and current-month usage (also available programmatically via
GET /v1/usage). - Hard cap toggle: Switch it with the button in the Plan section.
| Setting | Behavior |
|---|---|
| ON | The API stops (429) when the monthly limit is reached, and no overage charges are incurred |
| OFF (default) | Detection continues beyond the limit, and the overage is metered at the overage unit price |
The
freeplan has the hard cap permanently ON (it cannot be disabled). Once the 50 monthly calls are used up, the Detection API returns429until the next month.
Plan changes and cancellation
Plan changes and cancellation are handled through your AWS Marketplace subscription management, not from this console.
| Action | When it takes effect |
|---|---|
| Upgrade (moving to a higher plan) | Immediately. The remaining period from the change date to the contract end date is billed on a prorated basis |
| Downgrade (moving to a lower plan) | Not available during the contract term. Choose a different plan at the contract renewal timing |
| Cancellation | Auto-renewal is stopped and the contract ends on its end date (mid-term cancellation is not available) |
Contract modification is available only for contracts with auto-renewal enabled (Auto-renewal: On).
Upgrading your plan
Sign in to AWS Marketplace with the AWS account used for the contract before you begin.
Open the AWS Marketplace product page for the Liveness Detection API by Swallow Incubate.
https://aws.amazon.com/marketplace/pp/prodview-24ciftyaakrsa
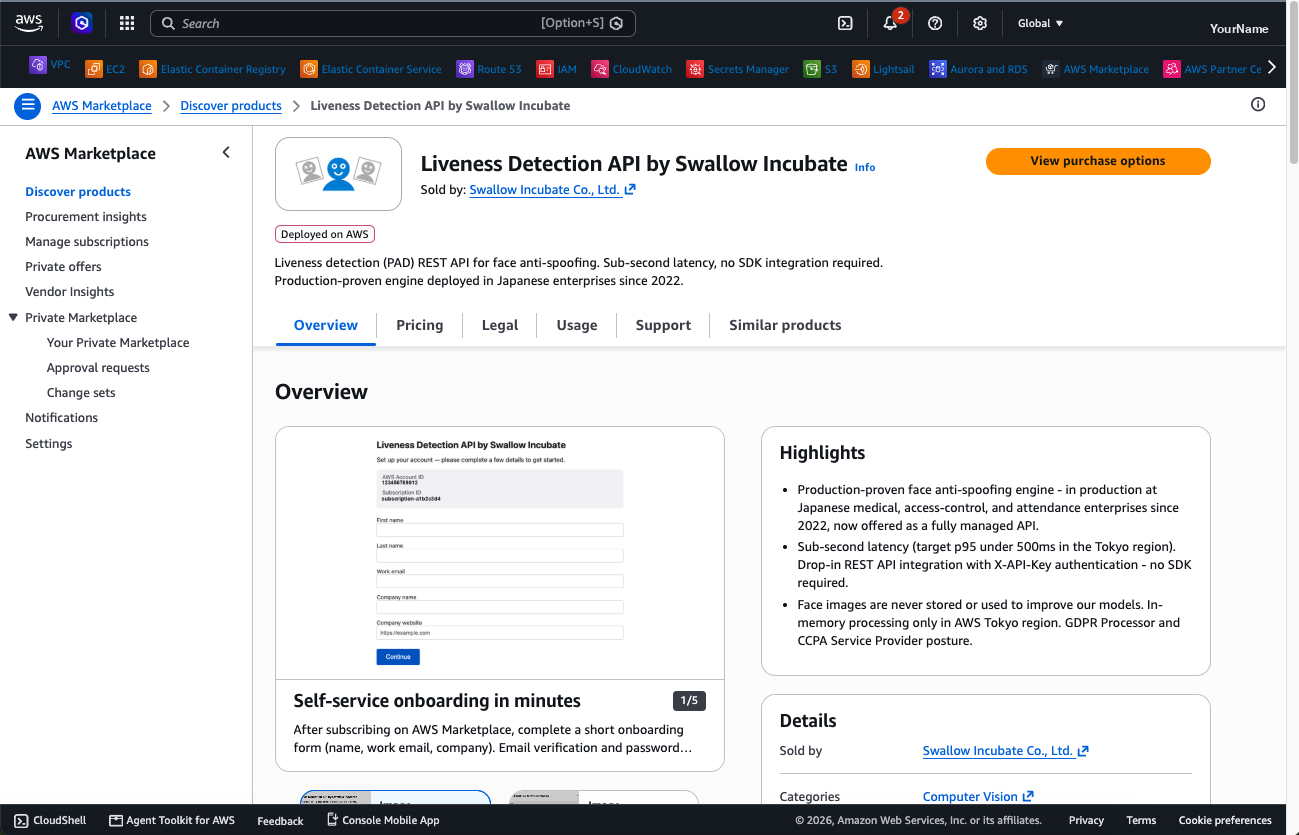
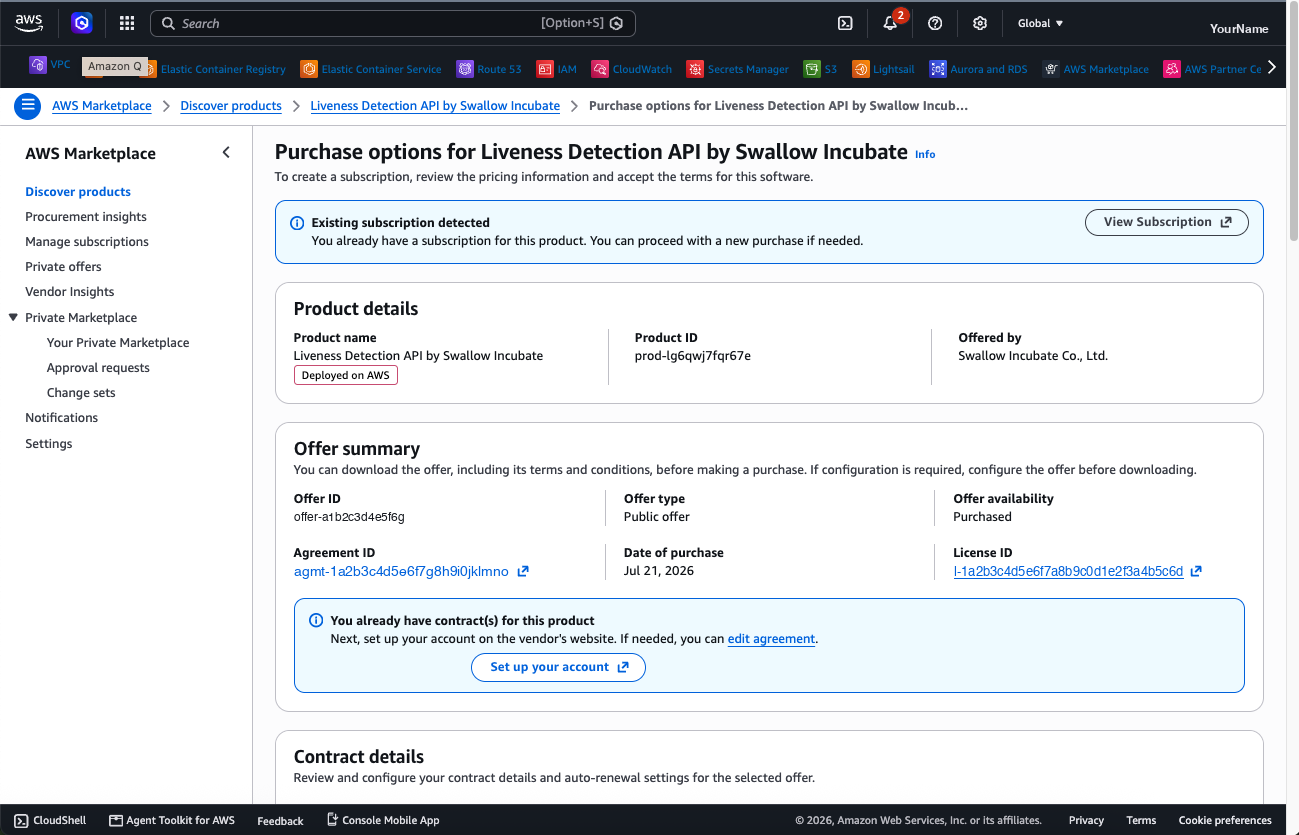
Click View purchase options to open the subscribe page, then click edit agreement in the You already have contract(s) for this product box.
Because you already have a subscription, Existing subscription detected appears at the top of the page. Offer summary shows your current Offer ID, Agreement ID, date of purchase, and License ID.
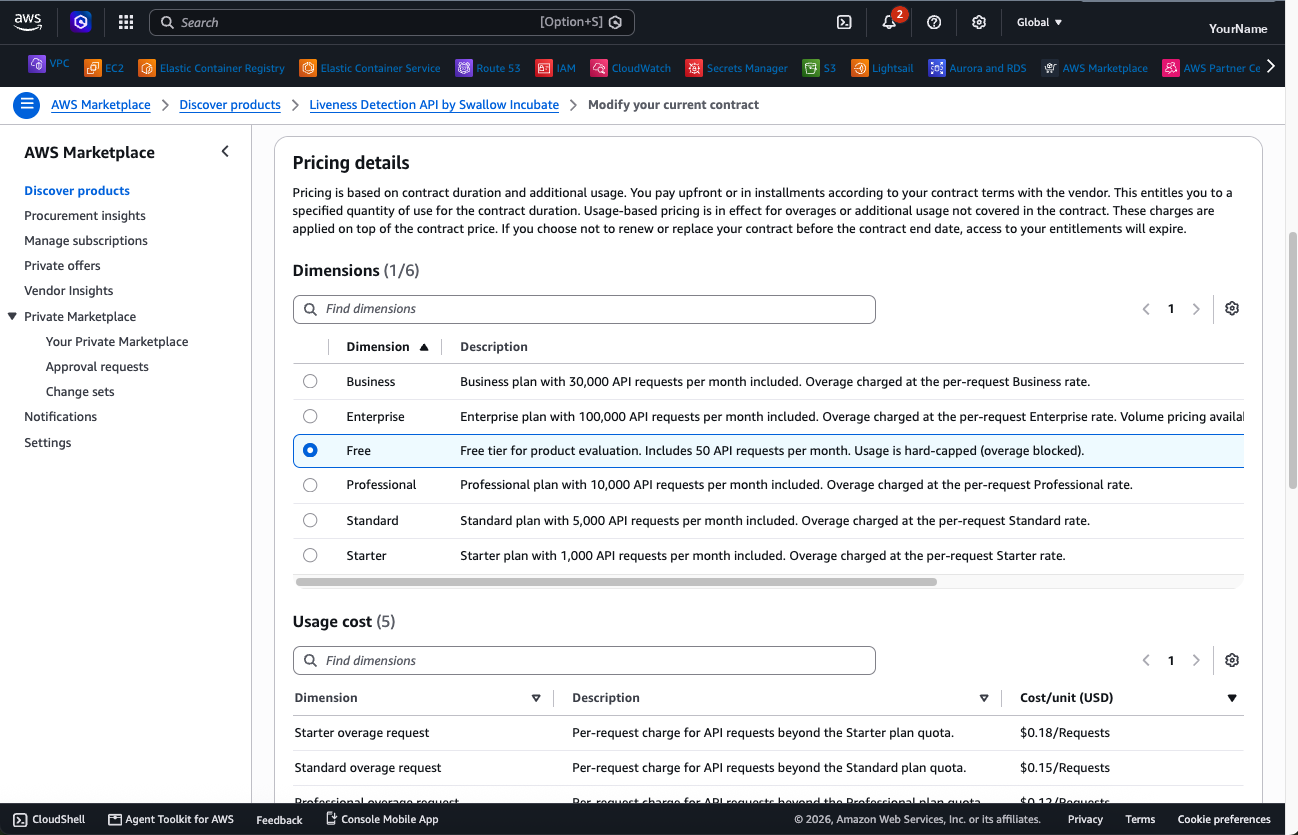
When Modify current contract opens, scroll to Pricing details. The Dimensions list shows your current plan already selected (the example below shows the Free plan).
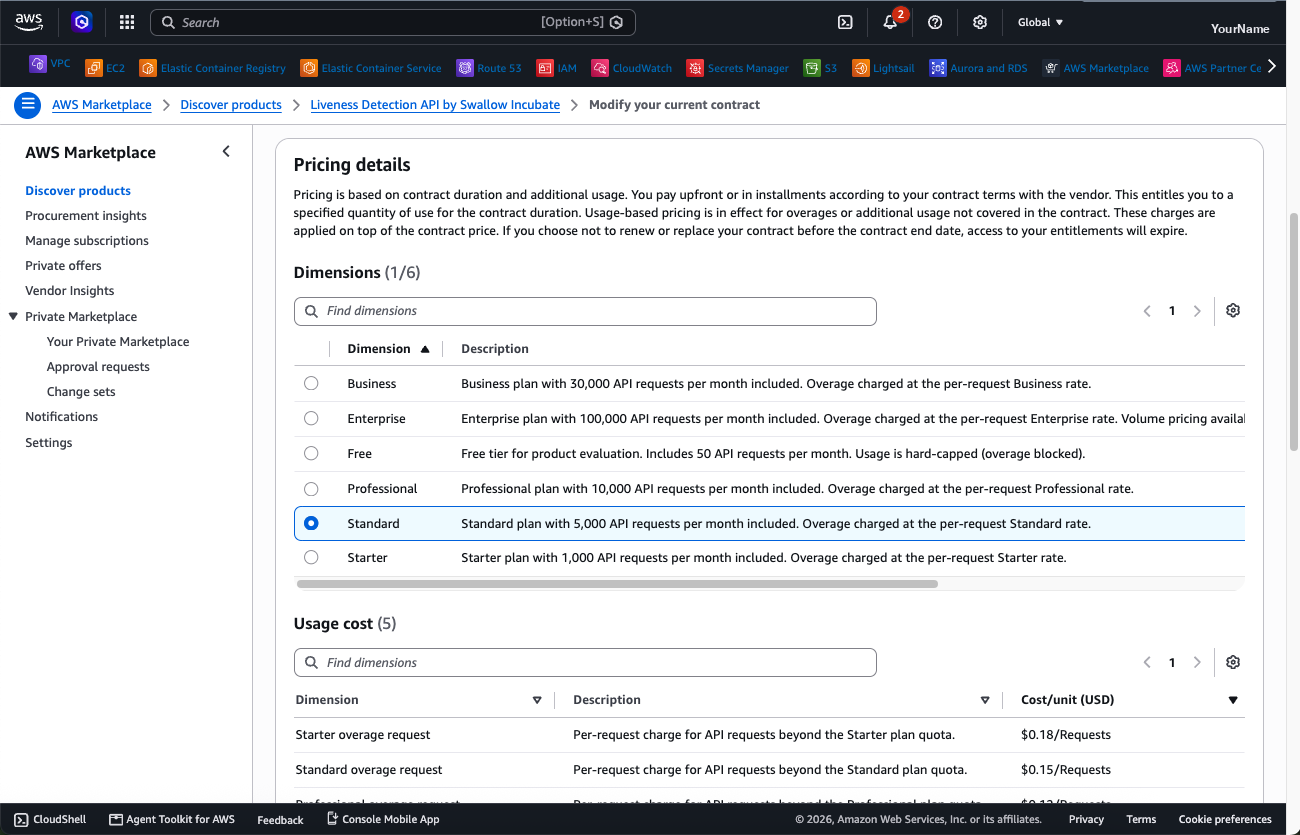
Select the radio button for the plan you want to move to. For the monthly call count and overage unit price of each plan, see Plans and Usage Limits. Only one plan can be selected — confirm that Number of dimensions selected is
1.
You cannot downgrade (move to a lower plan) from this screen. Selecting a cheaper plan would bring the total cost below $0, which AWS does not accept, so the Save changes button stays disabled. To move to a lower plan, choose it at the contract renewal timing.
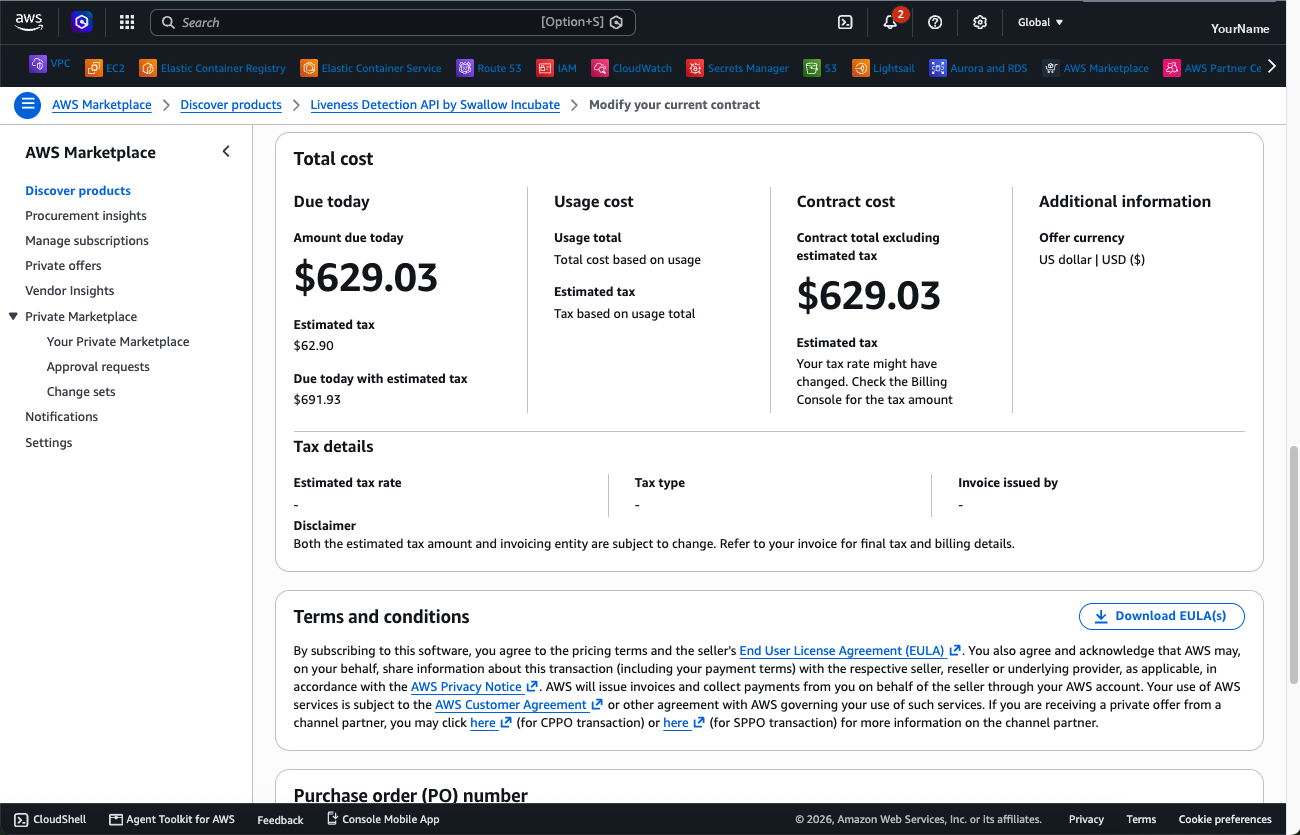
Check the charges under Total cost. Amount due today shows the prorated amount for the remaining period from the change date to the contract end date (the example below is a change to the Standard plan at $750/month with 26 days remaining: $750 × 26/31 = $629.03). Also review the EULA under Terms and conditions.
Review your changes in Purchase details at the bottom of the page and click Save changes.
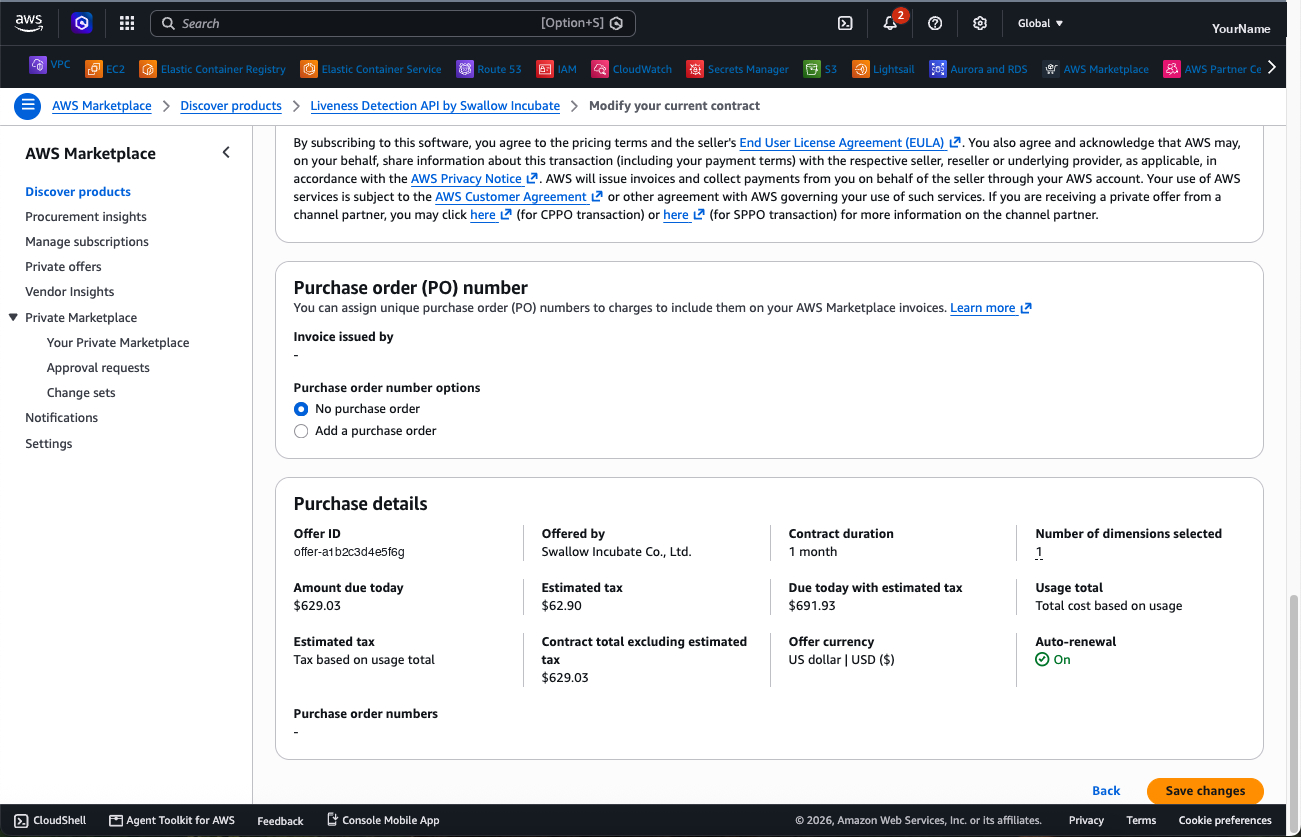
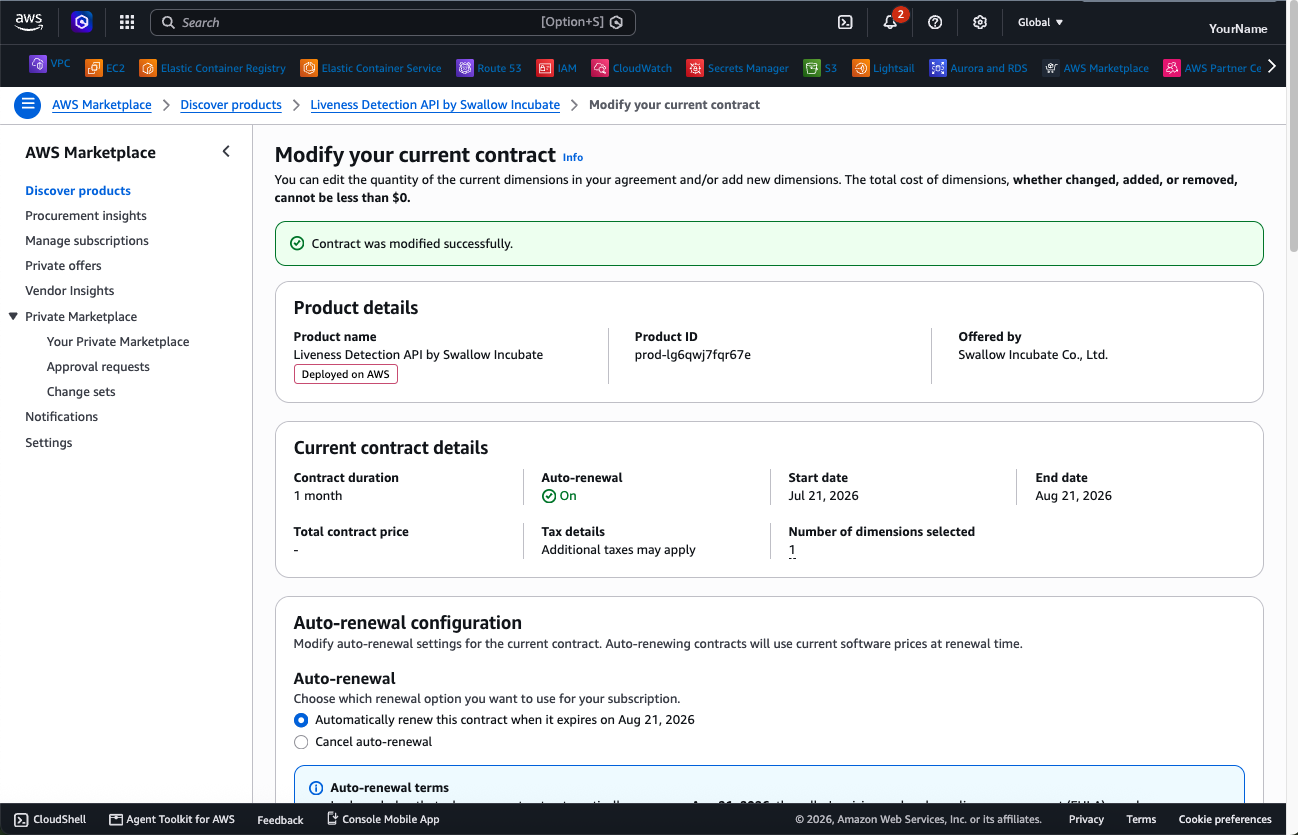
The contract change is complete once Contract was modified successfully. appears. Your contract End date remains unchanged.
The new plan is normally reflected in the customer console within tens of seconds.
https://liveness.api.pas-ta.io/console/dashboard
Confirm that Plan and Monthly limit in the Plan section show the new plan (you can also check this with
GET /v1/usage).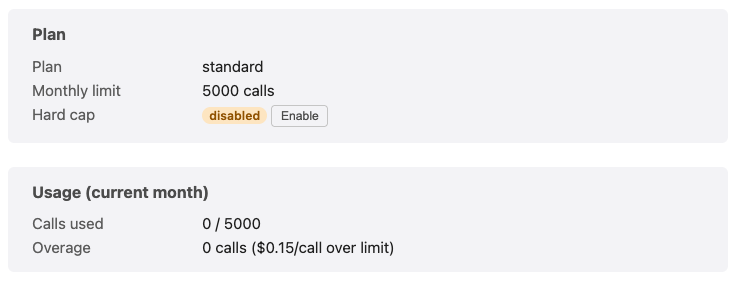
If it is still not reflected after a while, please contact Support.
Cancelling (stopping auto-renewal)
Cancellation is done from the same screen. Open Modify current contract using steps 1–2 above, select Cancel auto-renewal under Auto-renewal configuration at the top of the page, and click Save changes at the bottom.
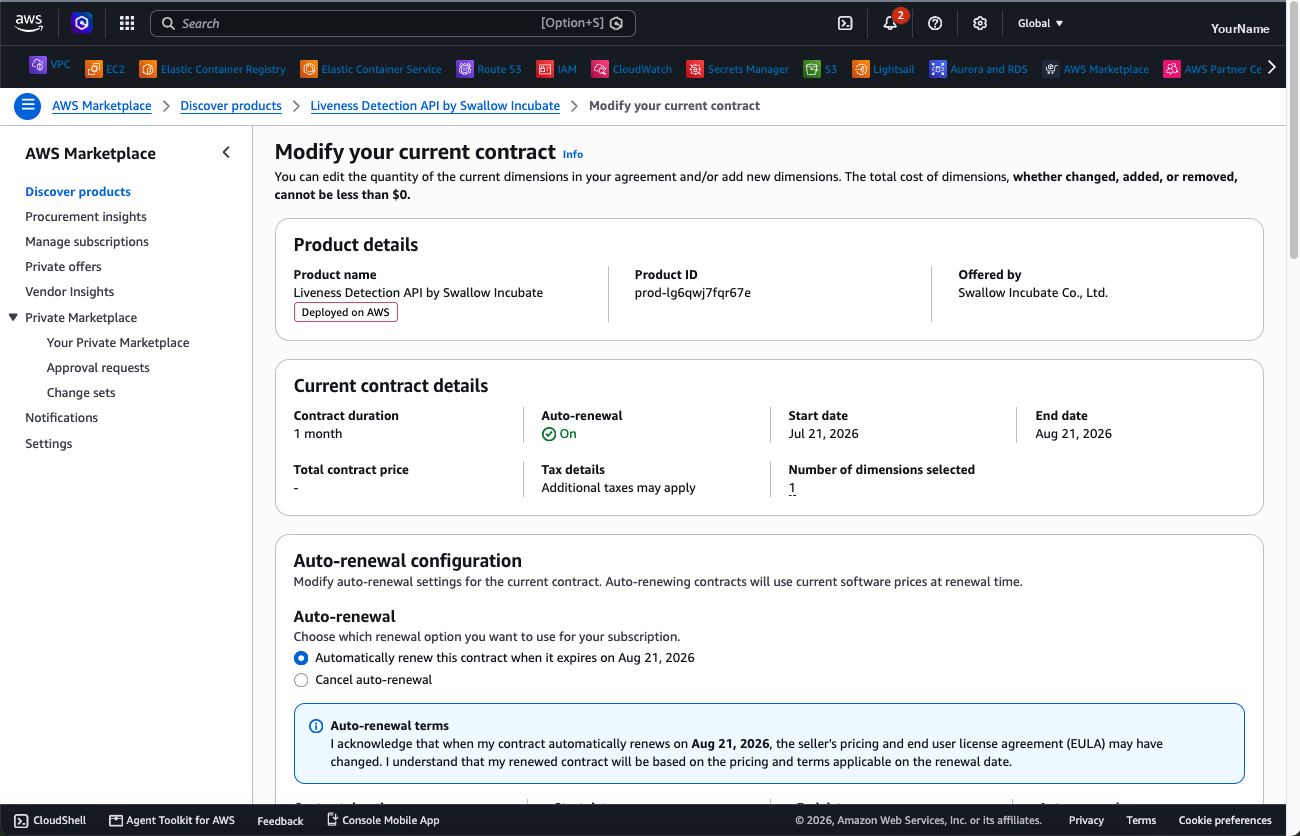
Your contract ends on the contract end date shown as End date under Current contract details.
- Mid-term cancellation with a refund is not available.
- You can continue using the API as usual until the contract end date.
The layout and button labels on the AWS Marketplace side may be changed by AWS. For the latest details, also refer to the AWS documentation (Modifying an existing public contract).
If you have any questions, please contact Support.